
Table of Contents
What Is StoryMaps?
Esri StoryMaps is a story authoring web-based application on the ArcGIS platform that enables you to share your maps in the context of narrative text and other multimedia content. Stories can include maps, narrative text, lists, images, videos, embedded items, and other media. Publish and share your stories with specific groups, with Grinnell College, or publicly.
StoryMaps is an Esri product, as is ArcGIS Online, and you can seamlessly integrate ArcGIS Online maps into a StoryMap.
Logging In
1. Log in to your ArcGIS Online account at https://grinnell.maps.arcgis.com/home/index.html
2. Click the app launcher icon (nine-dot square) in the top level menu: ![]()
3. Then click on the StoryMaps icon: ![]()
Walkthrough
Before getting started, download the ZIP file of sample data for this walkthrough.
- Click the + New story button to create a new story. For the purposes of this walkthrough, select the “Start from scratch” option.
- Give your story a title and, optionally, a short description or subtitle.
- Click the green plus button to begin adding content:
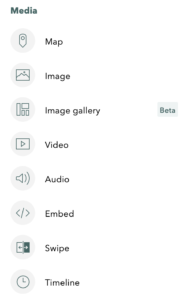
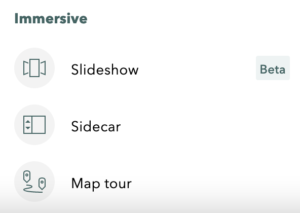
- Choose from basic (text, button, separator), media, and immersive content options:

 Selecting one type will bring up options for adding content of that type and for simple editing and styling.
 - Click the plus button underneath a content item, choose another content type, and add more content to your StoryMap – rinse, lather, repeat until you’ve created a StoryMap that you’re happy with!
- For the purposes of this basic walkthrough, follow along with the provided sample text, using the sample images shared from the beginning, middle, and end of the StoryMap.
- See this “final result” example from Esri for an example of how to lay out the content provided.
- To edit text content, simply click into it and type away. To edit multimedia content, hover over it with your mouse and view the options that appear.
- Move a content item up or down on your map by clicking and dragging the “handle” icon (two three-dot columns) that appears when you hover over it with your mouse:
- Use the Design menu option at the top to style your StoryMap: choose the cover layout, select whether you want the navigation and credit options to appear, and select one of the available themes for your story.
- You can click the Preview menu option at the top to see what your StoryMap will look like to viewers.
- When you’re ready to publish your StoryMap, click the Publish menu option at the top: this will reflect your changes in the published version. StoryMap saves as you go, but will not publish changes to the finished version without your say-so.


Accessibility
As you create StoryMaps, keep the following in mind:
- be thoughtful in your use of color and ensure appropriate color contrasts with text and backgrounds
- consider how you can avoid using color alone to convey meaning
- break up walls of text
- ensure appropriate typeface and font size when you are customizing
- provide links that make sense out of context (i.e., no “click here”)
- provide alt text for images
See the “Getting started with accessible storytelling” StoryMap from Esri for more information and resources.
Resources
- Vivero Documentation site page on StoryMaps
- What Is ArcGIS StoryMaps?
- Getting Started with ArcGIS StoryMaps (a StoryMaps tutorial in the form of a StoryMap!)